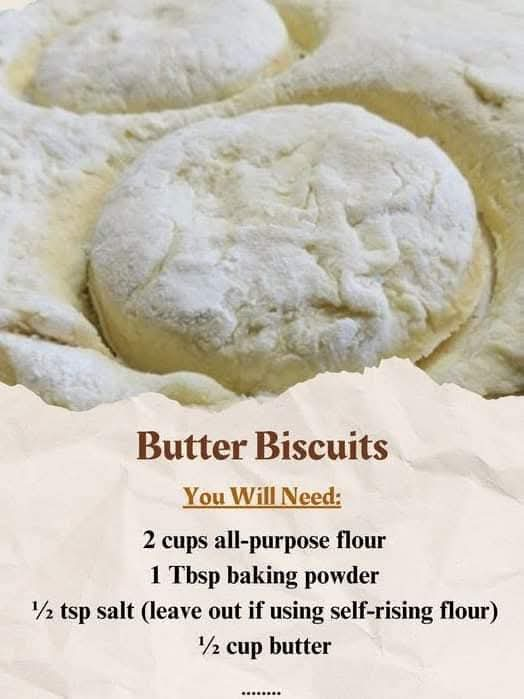
Butter Biscuits – A Classic Recipe You’ll Treasure Forever
If you’re looking for the ultimate recipe for soft, flaky, buttery biscuits, you’re in the right place. These Butter Biscuits are simple to make, require basic pantry ingredients, and come out golden and delicious every time. Whether you’re serving them for breakfast, as a dinner side, or with your favorite jams and spreads, this recipe is guaranteed to become a staple in your kitchen.
Ingredients
Dry Ingredients:
- 2 cups all-purpose flour, packed
(If you prefer self-rising flour, you can use it but omit the baking powder and salt listed below) - 1 tablespoon baking powder (skip this if using self-rising flour)
- ½ teaspoon salt (skip this if using self-rising flour)
Wet Ingredients:
- ½ cup salted butter, cut into small cubes
(If using unsalted butter, increase the salt to ¾ teaspoon) - 1 cup milk, regular or buttermilk
Step-by-Step Instructions
1. Prepare Your Ingredients and Tools
- Preheat your oven to 400°F (200°C). A hot oven is crucial for getting a quick rise and golden tops.
- Gather a large mixing bowl, a rolling pin, and a biscuit or cookie cutter. If you don’t have a cutter, a drinking glass works in a pinch.
2. Combine the Dry Ingredients
- In the large mixing bowl, whisk together the flour, baking powder, and salt. This ensures the leavening agents are evenly distributed for an even rise.
3. Cut in the Butter
- Add the cubed butter to the flour mixture. Using your hands or a pastry cutter, gently work the butter into the flour until it resembles coarse crumbs, with some pea-sized pieces of butter remaining.
- The butter should stay cold during this process—this is the secret to flaky biscuits! If the butter softens, pop the bowl into the fridge for 5 minutes before continuing.
4. Add the Milk
- Gradually pour in the milk, stirring gently with a wooden spoon or spatula until a soft dough forms. Take care not to overmix, as this can make your biscuits dense.
5. Shape the Dough
- Turn the dough out onto a floured surface. Lightly knead it 4-5 times, just enough to bring it together.
- Roll out the dough to a thickness of about ¾ inch. This ensures thick, fluffy biscuits that rise beautifully in the oven.
6. Cut Out the Biscuits
- Use your biscuit cutter or a round glass to cut out the biscuits. Press straight down without twisting—twisting can seal the edges, preventing the biscuits from rising properly.
- Re-roll any scraps of dough and cut out additional biscuits.
7. Arrange for Baking
- Place the biscuits on an ungreased baking sheet or in an iron skillet. For softer sides, make sure the biscuits are touching; for crisper edges, leave a bit of space between them.
8. Bake the Biscuits
- Bake in the preheated oven for 10–12 minutes, or until the tops are golden brown.
- For extra flavor, brush the tops with melted butter as soon as they come out of the oven.
9. Serve Warm
- Let the biscuits cool slightly before serving. They’re best enjoyed fresh out of the oven, spread with butter, honey, or your favorite jam.
Tips for Perfect Butter Biscuits
- Cold Ingredients are Key:
Cold butter creates steam pockets during baking, resulting in those signature flaky layers. Keep the butter and milk chilled until you’re ready to use them. - Avoid Overmixing:
Handle the dough as little as possible to keep the biscuits light and tender. Overmixing or over-kneading can lead to tough biscuits. - Use Buttermilk for Tangy Flavor:
If you have buttermilk on hand, substitute it for regular milk. Its acidity reacts with the baking powder, giving the biscuits extra lift and a slight tang. - Flour Your Cutter:
Lightly flour your biscuit cutter to prevent the dough from sticking. This ensures clean cuts and evenly shaped biscuits. - Bake in a Skillet for a Rustic Look:
If you have an iron skillet, use it to bake the biscuits for a crispy bottom and rustic presentation.
Storage and Reheating
To Store:
- Let the biscuits cool completely, then store them in an airtight container at room temperature for up to 2 days. For longer storage, freeze them for up to 2 months.
To Reheat:
- Warm biscuits in a 350°F (175°C) oven for 5–7 minutes or microwave for 15–20 seconds. Brush with a bit of melted butter before serving to refresh their flavor.
Why You’ll Love These Butter Biscuits
- Quick and Easy: From start to finish, these biscuits come together in just about 20 minutes.
- Versatile: Enjoy them with breakfast, dinner, or as a snack with sweet or savory toppings.
- Classic Flavor: The buttery, flaky texture is a crowd-pleaser every time.
- Customizable: Add shredded cheese, fresh herbs, or a sprinkle of sugar to adapt them to your meal or craving.
Serving Suggestions
- For Breakfast: Pair with scrambled eggs, bacon, or sausage gravy for a hearty start to your day.
- For Dinner: Serve alongside soups, stews, or roasted chicken as a warm and satisfying side.
- For Dessert: Add a drizzle of honey or a dollop of whipped cream and berries for a simple yet indulgent treat.
These Butter Biscuits are everything you want in a homemade recipe: easy, reliable, and utterly delicious. Whether you’re baking for a special occasion or a casual family dinner, they’re sure to impress.
Save this recipe—you’ll never need another one for biscuits again!
