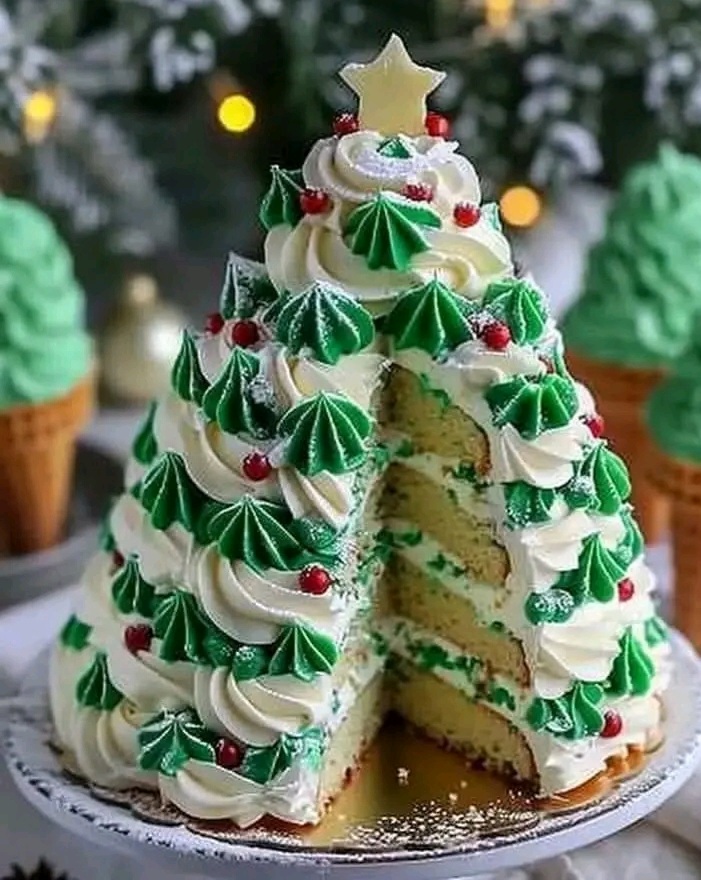
Christmas Tree Cake 🎄🍰
Servings: 12–16
Prep Time: 45 minutes
Bake Time: 25–30 minutes
Assembly Time: 30 minutes
Total Time: About 1 hour, 45 minutes
Ingredients
For the Cake:
- 2 boxes of your favorite cake mix (or homemade cake batter)
- 4 large eggs
- 1 cup vegetable oil
- 1 cup water
- 1 tsp vanilla extract
For the Buttercream Frosting:
- 2 cups unsalted butter, softened
- 4 cups powdered sugar
- 2 tsp vanilla extract
- 2–4 tbsp heavy cream
- Green food coloring (gel works best for vibrant color)
- A pinch of salt
For Decoration:
- Colorful sprinkles (as ornaments)
- Mini candy stars or star-shaped sprinkles (for the tree topper)
- Red candies (like M&Ms or red hots) for berries
- Miniature candy canes (optional)
- Powdered sugar (for a snowy effect)
Instructions
Step 1: Prepare the Cake
- Preheat the Oven: Preheat your oven to 350°F (175°C). Grease and flour three 8-inch round cake pans (or two 9-inch pans for a slightly shorter tree).
- Mix the Batter: In a large bowl, combine the cake mix, eggs, vegetable oil, water, and vanilla extract. Beat until smooth and lump-free.
- Bake the Layers: Divide the batter evenly between the prepared pans. Bake for 25–30 minutes, or until a toothpick inserted into the center comes out clean.
- Cool Completely: Let the cakes cool in the pans for 10 minutes, then turn them out onto a wire rack to cool fully.
Step 2: Prepare the Buttercream Frosting
- Cream the Butter: In a large bowl, beat the softened butter with an electric mixer until smooth and creamy.
- Add the Powdered Sugar: Gradually add the powdered sugar, one cup at a time, mixing thoroughly between additions.
- Add Flavor and Adjust Consistency: Mix in the vanilla extract and heavy cream (1 tablespoon at a time) until the frosting reaches a spreadable or pipeable consistency. Add a pinch of salt to balance the sweetness.
- Color the Frosting: Add green food coloring, starting with a few drops and increasing until you achieve your desired tree color.
Step 3: Assemble the Tree Cake
- Stack the Layers: Place one cake layer on a cake board or serving platter. Spread a layer of frosting evenly over the top. Repeat with the remaining layers, ending with a cake layer on top.
- Carve the Tree Shape: Use a serrated knife to carefully cut the stacked cake into a triangle (tree) shape. Save the scraps for snacking or use them to create additional tree branches.
- Crumb Coat: Spread a thin layer of frosting over the entire cake to seal in crumbs. Chill the cake in the refrigerator for 20–30 minutes to set the crumb coat.
Step 4: Decorate the Cake
- Frost the Tree: Using a piping bag fitted with a star or leaf tip, pipe the green frosting onto the cake in a tree-like texture. Alternatively, spread the frosting with an offset spatula for a smooth finish.
- Add Ornaments: Decorate the tree with colorful sprinkles and candies as ornaments.
- Top the Tree: Place a mini candy star or sprinkle star at the top of the tree.
- Optional Extras: Add miniature candy canes around the base or on the tree for a festive touch.
- Snow Effect: Dust the cake lightly with powdered sugar to mimic freshly fallen snow.
Tips for Success
- Gel Food Coloring: Use gel-based food coloring for vibrant, concentrated color without altering the frosting consistency.
- Chilling for Stability: Chill the cake layers before assembling and frosting to prevent shifting or crumbling.
- Variation: Substitute chocolate cake for a rich “tree bark” effect or use red velvet cake for a surprise inside.
This Christmas Tree Cake is as fun to decorate as it is to eat! Its whimsical design and delicious flavor will bring joy to your holiday gatherings. Happy baking and decorating! 🎄
