Easy No-Bake Fruit Trifles and Fluff Salads
When it comes to hosting a summer gathering, a holiday potluck, or a casual family dinner, we all want a dessert that looks spectacular but doesn’t require hours over a hot stove. Enter the classic, vibrant world of layered trifles and creamy fruit fluff salads.
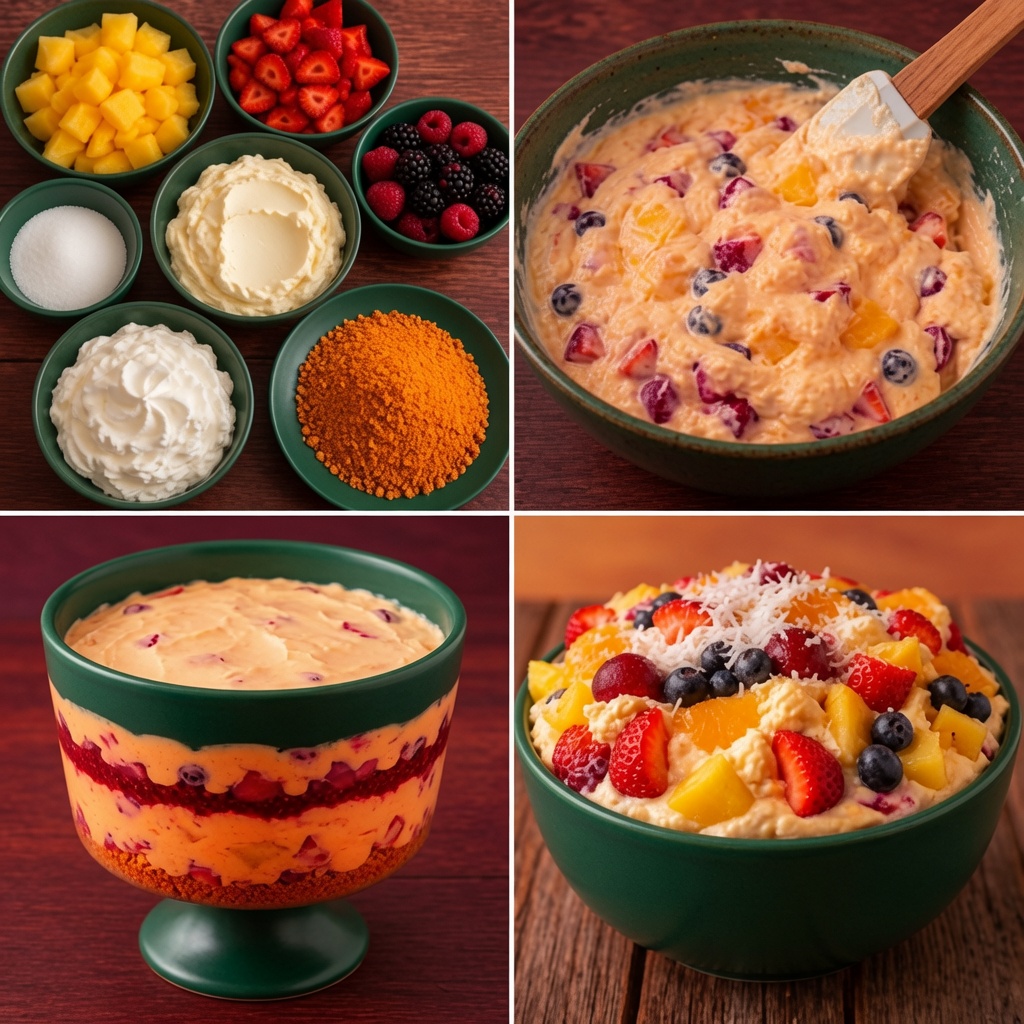
As beautifully demonstrated in the step-by-step imagery of these desserts are the ultimate crowd-pleasers. They combine fresh textures, rich creams, and crunchy foundations into a single centerpiece. Best of all, they are highly customizable, incredibly forgiving for beginner bakers, and perfectly suited for quick preparation.
The Anatomy of a Perfect Layered Dessert
Creating a dessert like the ones shown in grok-image-4a7645b5-2c1c-437a-b1c5-66d2ada7e114.jpg comes down to balancing three core elements: texture, acidity, and sweetness. When you break these down into distinct components, assembly becomes an effortless assembly line.
1. The Crunchy Foundation
Every great layered dessert needs a structural base to ground the softer elements. Common choices include:
- Crushed Graham Crackers or Cookies: As seen in the raw ingredients panel of the image, finely ground graham crackers, vanilla wafers, or ginger snaps create an excellent crust-like layer.
- Cubed Pound Cake or Sponge Cake: If you prefer a traditional British trifle texture, using dense cubes of cake allows the fruit juices and creams to soak in without turning the dish mushy.
2. The Creamy Binder
The cream element bridges the gap between your crust and your fruit. You can lean toward a light, airy texture or a dense, cheesecake-like filling depending on your preference.
- The Fluff Base: Mixing whipped topping with softened cream cheese or instant pudding mix (vanilla, white chocolate, or cheesecake flavors) creates a stable, rich mousse.
- The Yogurt Option: For a lighter, more refreshing afternoon treat, vanilla Greek yogurt can be substituted to add a subtle tang that cuts through the sweetness.
3. The Fresh Fruit Medley
Fruit provides the vibrant color pops and natural acidity needed to balance the heavy creams. Excellent pairings include:
- Tropical Fruits: Diced mangoes, pineapples, and oranges bring a bright, sunny sweetness.
- Berries: Fresh strawberries, blueberries, raspberries, and blackberries add an earthy tartness and stunning deep red and blue hues.
Step-by-Step Assembly: From Prep to Presentation
Following the visual journey in grok-image-4a7645b5-2c1c-437a-b1c5-66d2ada7e114.jpg, you can see how easily these individual components come together into finished showstoppers.
[Mise en Place: Prep Bowls] ──> [Gently Fold Ingredients] ──> [Layer in Trifle Dish or Serve in Bowl]
Step 1: Mise en Place (Preparation)
Before mixing anything, wash and dice all your fresh fruits into uniform, bite-sized pieces. Separate your whipped ingredients, sugars, and crushed cookie bases into individual bowls. Having your station organized prevents the ingredients from getting warm or melting while you work.
Step 2: Incorporating the Mix-Ins
For a traditional “fluff salad” or a simplified fruit salad bowl (as shown in the right-hand panels of the image), gently fold your diced fruits directly into the cream base using a rubber spatula. Avoid over-mixing, as rough handling can cause the berries to bleed their juices, turning your beautiful white or orange cream a muddy gray color.
Step 3: Layering or Garnishing
If you are assembling a classic trifle (bottom-left panel), use a clear glass pedestal dish to showcase the layers. Begin with a thick layer of your crushed cookie base at the very bottom. Follow with a layer of cream, then a layer of dense fruit, repeating the pattern until you reach the top.
If you prefer a blended dessert bowl (bottom-right panel), scoop your fruit-and-cream mixture into a large serving dish and finish it with a generous scattering of whole berries, citrus slices, and a dusting of shredded coconut.
Pro-Tips for Making and Storing Your Desserts
To ensure your dessert looks and tastes impeccable by the time your guests dig in, keep these professional kitchen tips in mind:
The Chilling Rule: No-bake desserts need time to set. Always cover your finished dish with plastic wrap and let it chill in the refrigerator for at least two to four hours before serving. This allows the cookie crumbs to soften slightly and the flavors to fully meld together.
- Drain Canned Fruits Thoroughly: If you are using canned pineapple chunks or mandarin oranges instead of fresh fruit, let them sit in a fine-mesh colander for 10–15 minutes. Excess syrup will thin out your cream base and make the entire dessert watery.
- Preventing Apple/Banana Browning: If your fruit medley includes apples or bananas, toss the slices in a tablespoon of fresh lemon juice before mixing them into the cream. The citric acid prevents oxidation and keeps your fruit looking pristine.
- Make It Ahead of Time: You can easily prepare the individual components up to 24 hours in advance. Store the whipped cream, chopped fruit, and crushed graham crackers in separate airtight containers in the fridge, then do a quick 5-minute assembly right before your event begins.